How I Learned To Understand a Soil Test Result (Without Needing a Science Degree)
Composting Soil & Compost
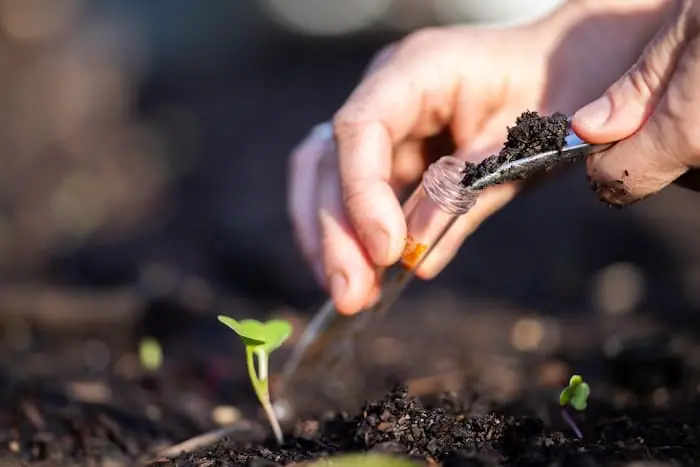
I didn’t set out to learn soil fertility science. I wanted tomatoes that tasted homegrown, lettuces that didn’t produce milky substances when I picked them, and garden beds that didn’t feel like they needed rescuing every July. The soil test result numbers showed up later, sort of uninvited, like a gregarious stranger at a gardening show who wanders over mid-conversation and suddenly won’t leave.
At first, I didn’t bother with soil testers.
I’d hear people talk about base saturation, calcium ratios, or something called CEC, and I’d nod politely while, behind my eyes, I was a glazed donut. I’d go home and spread compost like it was holy water. Compost fixed everything. Until it didn’t. “I have got to sign up for that Master Gardening Class at my local community college,” I would say to myself… and that is true. I really want to sign up for the class, but all I want to do is hang out in my garden. So I broke down and had my soil professionally tested. And then came the soil test results, and I finally understood what my dirt needed.
The moment soil science got real for me was a breakthrough. Plants are growing fine in one bed and struggling ten feet away. Same sun. Same water. Same compost. Different mood entirely. The test showed that my dirt had opinions.
Think of soil tests as a translator, a way to understand how the soil talks back.
When “Good Soil” Stops Being a Useful Concept
“Good soil” is a phrase I used for years without knowing what I meant. Dark. Crumbly. Earthy smell. Worms if I was lucky. That got me pretty far.
But realize, there are different kinds of good. Some look good, but behave badly.
I had one garden bed that stayed fluffy no matter what. Water soaked in. Roots were happy. Another one crusted over, cracked, and stayed wet underneath. Both got compost. Both got mulch. Only one was cooperative.
A soil tester finally explained what my hands already knew. One bed had calcium for structure. The other had magnesium hanging onto everything. Same compost. Very different chemistry.
That was my first lesson: fertility isn’t just about nutrients. It’s about balance and behavior.
Soil Numbers Are Just Descriptions, Not Instructions
Here’s where people get spooked. They see a soil test and think it’s a prescription. Like if you don’t do exactly what it says, something bad will happen.
That’s not how I use them.
A soil test is like a snapshot taken on a slightly off day. It tells you tendencies. The mistake is thinking the calculator knows your garden better than you do.

I once ran the same soil through two labs and got results that agreed in spirit but not in detail. Phosphorus was “high” in one and “very high” in the other. Magnesium shifted just enough to change the recommended lime type. Science experiments tend to make me sweat and feel like I am back in high school, having to deduce and then write a paper. No, thank you.
Instead, I looked for patterns:
- What’s consistently high?
- What’s consistently low?
- What lines up with what I’m seeing above ground?
That’s where the numbers start to earn their keep.
CEC Sounds Scarier Than It Is
Cation Exchange Capacity is one of those phrases that clears a room. It shouldn’t.
All it’s really telling you is how many parking spaces your soil has for nutrients. (Cation Exchange Capacity – Soil Health Nexus, n.d.)
Sandy soils vs Clay Soils: Sandy soils contain the largest particles, making them less likely to have visible spots, while soils with more clay or organic matter tend to display more visible spots due to their finer particles. (Soil Basics, n.d.)
Low CEC means nutrients are available and move in and out quickly. If your soil can’t hold onto nutrients, gentler, more frequent feeding makes sense. If it holds onto everything like a vault, restraint becomes a virtue. (Cation Exchange Capacity and Base Saturation, 2025)
Only read this next paragraph if you are ok with taking a deeper dive into the academics of this: According to Southern Scientific Ireland, soils with high cation exchange capacity (CEC) can retain nutrients for longer, which can sometimes lead to them lingering in the soil longer than necessary. This is important because soil test calculators may not always account for these factors when recommending adjustments. A recommendation that makes sense for a low-CEC soil can overload a high-CEC one. That’s why some people see high calcium numbers on their soil test reports but still have compacted soil in their gardens. According to experts at Ohio State University Extension, it’s important to understand your soil’s cation exchange capacity (CEC) first, as this key property helps predict how well your soil can hold and supply nutrients. It frames the whole conversation.
Ratios Are Useful Until They Aren’t
Many gardeners pay attention to soil nutrient ratios like calcium to magnesium, but according to Michigan State University Extension, as long as your soil has enough calcium and magnesium and the pH is good, the specific ratio between these nutrients usually does not affect plant growth. Potassium to calcium. Base saturation targets that sound suspiciously precise.
They’re not wrong. They’re just not laws.
I’ve had soils with “perfect” ratios that still grew mediocre plants. I’ve had others wildly out of spec that produced like champions.
The difference was context.
According to Intrepid Potash (a U.S. based fertilizer and mineral company), magnesium is actually more mobile in the soil than other cations, so it is less likely to contribute to soil tightening or compaction. These interactions matter most at the edges.
I use ratios like I use weather forecasts. They inform decisions, but I still look out the window.
Calculators Are Best Used With a Raised Eyebrow
Soil calculators are seductive. Plug in numbers, get answers. Pounds per thousand square feet. Exact amounts. Clean and decisive.
They make you feel like you’re finally doing it right.
They’re also working off assumptions:
- Average soil behavior
- Average crop demand
- Average growing conditions
Your garden is not average.
I use calculators to understand scale, not precision. If it says I need 50 pounds of gypsum, that tells me this isn’t a teaspoon problem. If it says two pounds of boron, that’s a red flag to slow way down and double-check everything.

Some nutrients punish enthusiasm.
According to the Oregon State University Extension Service, boron is best applied as a foliar spray in the fall or spring before bloom, while soil-applied boron works best as a pre-plant amendment. Even small mistakes in micronutrient measurements like boron can have lasting effects.
Micronutrients Are Where Confidence Goes to Die
The Oregon State University Extension Service also notes that nitrogen is more forgiving than micronutrients, since you can supplement it later if compost contains less than needed.cent total nitrogen. Calcium can be nudged. Phosphorus mostly just sits there, unimpressed.
Micronutrients are different.
Iron, manganese, copper, zinc — they operate in shadows. Too little causes weird symptoms. Too much causes different, weird symptoms. Sometimes, both look the same. (Understanding Micronutrients and Greenhouse Vegetables, n.d.)
I corrected the manganese deficiency only to realize later that it was actually iron, locked up by the high pH. According to Penn State Extension, calculators or basic numbers can’t tell you whether your irrigation water comes from limestone country, which is why regular water testing is important to understand the minerals and quality factors in your water.
Why I Still Test, Despite All This
With all these caveats, you’d think I’d ditch testing altogether. I haven’t.
I test because memory is unreliable. Because intuition drifts. Because gardens change slowly enough that you can convince yourself nothing has.
A test every couple of years keeps me honest. It shows trends more than the truth.
Is organic matter creeping up or sliding back?
Is calcium accumulating?
Is potassium quietly disappearing with every harvest?
Those are long-term questions. Compost alone doesn’t answer them.
The Fertility Decisions That Actually Mattered
Looking back, the biggest improvements in my garden didn’t come from chasing every number into range. They came from a few quiet choices:
- Fixing the structure before feeding plants
- Stopping magnesium when calcium was the real issue
- Feeding less, more often, instead of correcting everything at once
- Accepting that some beds will never be ideal, only managed.
One year, I followed a calculator too faithfully and pushed potassium hard. Yields jumped. Flavor dropped. The next year, I backed off, and the plants seemed calmer, if that makes sense.
Fertility affects personality, not just productivity.
Compost Still Matters — Just Differently Than I Thought
Compost doesn’t solve every problem, but it changes the conversation.
It increases CEC. Buffers mistakes. Softens the edges of bad decisions. It’s the reason I can experiment without too many catastrophic consequences.
But compost also brings nutrients whether you need them or not. That surprised me. Years of generous composting pushed phosphorus higher than I ever intended. Nothing died, but some things stopped listening.
Now I compost with intention. Still plenty. Just not blindly.
Reading a Soil Test Without Panic
When I open a new report, I don’t start at the recommendations. I scan the ranges. I circle the extremes. I ask what changed since the last time.
Then I close it for a day.
Seriously. Distance helps.
The next day, I decide what matters this season and what can wait. Soil fertility is not an emergency room. It’s more like physical therapy.
You Don’t Need to Understand Everything at Once
I still don’t. And I’m okay with that.
Some months, I focus on structure. Some months on trace minerals. Some months, I do nothing but observe and take notes.
The calculators will still be there. The soil will still respond, slowly, whether you micromanage it or not.
The trick is learning which numbers deserve your attention and which ones are just background noise for your garden.
That part can’t be calculated.
A Few Questions I’ve Actually Asked Myself
Do I need to fix this now, or can I live with it?
Most things can wait.
Is this number explaining a problem, or tempting me into one?
Big difference.
Would two gardeners make different choices here?
If yes, I slow down.
I’ll stop there, because that’s where my own thinking usually pauses — right before I’m tempted to overcorrect something that’s mostly fine.
Share this post
Table of Contents
- When “Good Soil” Stops Being a Useful Concept
- Soil Numbers Are Just Descriptions, Not Instructions
- CEC Sounds Scarier Than It Is
- Ratios Are Useful Until They Aren’t
- Calculators Are Best Used With a Raised Eyebrow
- Why I Still Test, Despite All This
- The Fertility Decisions That Actually Mattered
- Compost Still Matters — Just Differently Than I Thought
- Reading a Soil Test Without Panic
- You Don’t Need to Understand Everything at Once
- A Few Questions I’ve Actually Asked Myself
About the Author

Nicole Stark
Nicole started The Bright Garden after years of hands-on learning in her own backyard, where she fell in love with healthy soil, native plants, and gardening the natural way. She shares honest, experience-based tips and enjoys time outdoors — gardening, fishing, and slow living with family. Gardening style: Organic, a little wild, always evolving. Current favorites: Worm bins, pollinator plants, backyard dinners.
Interactive Guides


All categories
More From The Garden


Disclosure: This post may contain affiliate links. That means if you click and buy, The Bright Garden may earn a small commission, at no extra cost to you. We only recommend products we’ve vetted and believe will benefit our readers.